Step-by-step guide to changing Mitsubishi L200 brake pads: Ready to tackle a DIY brake job? This guide walks you through replacing your Mitsubishi L200’s brake pads, a crucial maintenance task that ensures your safety on the road. We’ll cover everything from gathering the right tools to post-installation checks, making this potentially daunting task surprisingly manageable. Get ready to save some cash and gain a new skill!
From safely jacking up your truck to meticulously installing new pads, we’ll provide clear, step-by-step instructions with helpful visuals. Learn how to identify potential problems and troubleshoot common issues, ensuring a smooth and successful brake pad replacement. Let’s get started!
Introduction to Mitsubishi L200 Brake Pad Replacement
Replacing your Mitsubishi L200’s brake pads is a crucial maintenance task that ensures your safety and the longevity of your braking system. This guide provides a step-by-step walkthrough of the process, empowering you to tackle this job confidently. Regular brake pad maintenance is essential for optimal braking performance and preventing costly repairs down the line. Neglecting brake pad replacement can lead to reduced braking efficiency, increased stopping distances, and potentially dangerous situations.Regular brake pad checks and replacements are vital for maintaining safe and reliable braking performance in your Mitsubishi L200.
Worn brake pads significantly increase stopping distances, putting you and others at risk. Furthermore, neglecting pad replacement can lead to damage to more expensive components like rotors and calipers, resulting in more significant repair bills.
Safety Precautions for Brake Pad Replacement
Before beginning any brake work, prioritizing safety is paramount. This includes ensuring the vehicle is securely parked on a level surface, engaged in park (or gear for manual transmissions), and the emergency brake is firmly engaged. Using jack stands to support the vehicle is also critical, never rely solely on a jack. Additionally, appropriate safety glasses and gloves should be worn to protect against potential injury from flying debris or contact with brake dust.
Disconnect the negative terminal of your battery to prevent accidental short circuits. Finally, consult your vehicle’s service manual for specific torque specifications and safety guidelines related to your Mitsubishi L200 model. Following these precautions will minimize risks and ensure a safe and successful brake pad replacement.
Gathering Necessary Tools and Materials

Replacing your Mitsubishi L200’s brake pads is a straightforward task, but having the right tools makes the job significantly easier and safer. Improper tools can lead to damage to your vehicle or even injury. This section details the essential tools and materials you’ll need for a successful brake pad replacement. Remember, safety is paramount when working on your vehicle’s braking system.Before you begin, ensure you have a clean and well-lit workspace.
This will help you avoid mistakes and ensure a smooth process. Gather all your tools and materials beforehand to prevent interruptions during the repair.
Required Tools and Materials
The following table lists the necessary tools and materials for replacing your Mitsubishi L200 brake pads. It’s crucial to use high-quality tools to avoid damage and ensure accuracy. Cheap or worn-out tools can slip or break, potentially leading to injury or vehicle damage.
| Tool | Description | Size/Type | Purpose |
|---|---|---|---|
| Jack | Hydraulic jack for lifting the vehicle. | Vehicle-appropriate capacity | Safely lifts the vehicle to access the brakes. |
| Jack Stands | Secure stands to support the vehicle’s weight. | Sufficient capacity for vehicle weight | Provides stable support, preventing the vehicle from falling. |
| Wheel Chocks | Blocks to prevent the vehicle from rolling. | Suitable for wheel size | Ensures vehicle stability during jacking and repair. |
| Lug Wrench | Wrench for removing and tightening wheel nuts. | Appropriate size for wheel nuts | Removes and secures the wheels. |
| Socket Wrench Set | Set of sockets for various bolts and nuts. | Include sizes commonly used on brake calipers (e.g., 12mm, 14mm, 17mm) | Removes and installs caliper bolts and other brake components. |
| C-Clamp or Caliper Compression Tool | Tool to compress the brake caliper piston. | Appropriate size for caliper piston | Recesses the caliper piston to accommodate the new brake pads. |
| Brake Cleaner | Aerosol spray for cleaning brake components. | Brake-specific cleaner | Removes grease, dirt, and debris from brake components. |
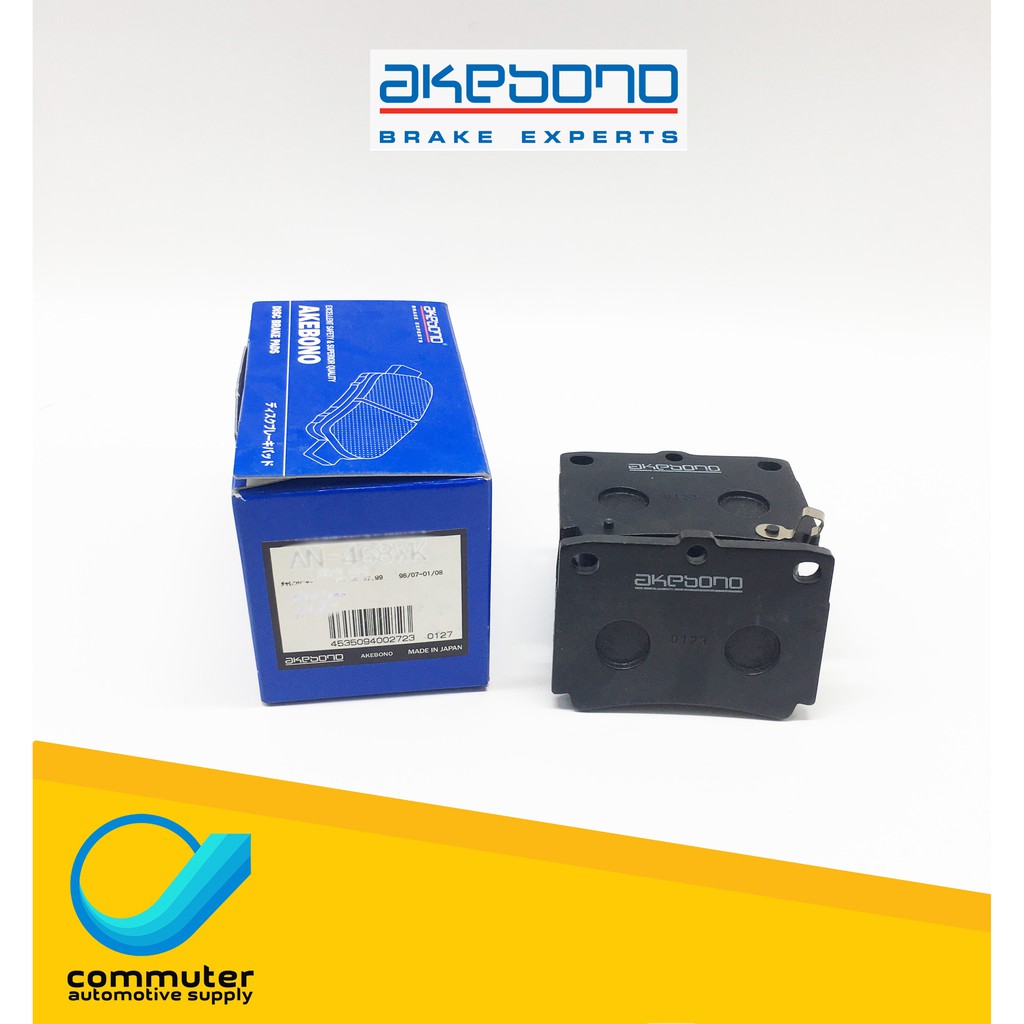
| New Brake Pads | Replacement brake pads specifically designed for your Mitsubishi L200 model and year. | Correct part number for your vehicle | Provides braking force. |
| Gloves | Protective gloves to prevent contamination and injury. | Heavy-duty work gloves | Protects hands from dirt, grease, and sharp edges. |
| Safety Glasses | Eye protection to prevent injury from flying debris. | Impact-resistant safety glasses | Protects eyes from potential hazards. |
Importance of High-Quality Brake Pads
Using high-quality brake pads is crucial for your safety and the longevity of your braking system. Inferior brake pads may wear out prematurely, leading to reduced braking performance and potentially dangerous situations. They may also produce excessive noise or dust. High-quality brake pads, on the other hand, are engineered for consistent braking power, longer lifespan, and reduced noise and dust.
Always choose brake pads from reputable manufacturers that meet or exceed the specifications for your Mitsubishi L200. Investing in quality brake pads is an investment in your safety.
Preparing the Vehicle for Brake Pad Replacement
Before you can access the brake pads on your Mitsubishi L200, you need to safely lift and secure the vehicle. This crucial step ensures your safety and prevents accidents during the brake pad replacement process. Improper jacking and securing can lead to serious injury or damage to the vehicle. Always prioritize safety.Properly jacking and securing your Mitsubishi L200 is paramount for a successful and safe brake pad replacement.
Failure to do so could result in the vehicle falling and causing injury. The following steps Artikel the correct procedure.
Vehicle Jacking and Securing
Locate the vehicle’s designated jack points, typically marked in the owner’s manual or visible as reinforced areas on the chassis. Position the jack securely under the designated point, ensuring a stable and level base. Slowly and steadily raise the vehicle until the wheel to be replaced is several inches off the ground. Never work under a vehicle supported only by a jack.Once the vehicle is raised, place jack stands under the chassis, positioned near the jacking points but on a sturdy part of the frame.
Knowing how to change your Mitsubishi L200 brake pads is a crucial DIY skill, saving you money on professional servicing. Regular brake pad replacement is a key part of your overall vehicle maintenance, and understanding the costs involved is essential; check out this helpful guide on Mitsubishi car maintenance schedule and costs to plan ahead. This will help you budget effectively for your L200’s upkeep, including those vital brake pad changes.
These stands provide a secondary support system, ensuring the vehicle’s stability even if the jack fails. Lower the vehicle onto the jack stands, ensuring they are firmly in place and the vehicle is evenly supported. Double-check the stability of the jack stands before proceeding.
Wheel Removal
With the vehicle securely supported by jack stands, you can now remove the wheel requiring brake pad replacement. Use a lug wrench to loosen the wheel nuts, turning them counter-clockwise. Once loosened, fully remove the nuts and carefully pull the wheel away from the vehicle. Keep the nuts together in a safe place to prevent loss. Set the wheel aside, ensuring it is not obstructing your work area.
Removing Old Brake Pads
With the wheel removed and the caliper exposed, you’re ready to tackle the old brake pads. This process involves carefully removing the caliper from the brake disc, compressing the caliper piston, and then extracting the worn-out pads. Remember, safety is paramount throughout this procedure.Removing the caliper usually involves unbolting it from its mounting bracket. This typically involves two or more bolts.
Use the appropriate size socket and wrench to carefully loosen and remove these bolts. Once the bolts are removed, gently swing the caliper away from the brake disc, being mindful not to damage any brake lines or other components. Support the caliper with a suitable wire or strap to prevent it from hanging by the brake line.
Caliper Piston Release
Releasing the caliper piston is crucial for installing the new brake pads. The piston needs to be compressed to create space for the thicker new pads. You’ll typically need a C-clamp or a specialized brake caliper piston compression tool. Insert the tool between the caliper piston and the caliper housing. Slowly and steadily compress the piston, ensuring it retracts smoothly into the caliper.
If the piston is particularly stiff, applying some penetrating lubricant to the piston’s surface may help. Be careful not to damage the piston seal during this process. It’s important to note that the piston may need to be rotated as you compress it. This is often necessary to allow the piston to retract evenly.
Safe Handling and Disposal of Old Brake Pads, Step-by-step guide to changing Mitsubishi L200 brake pads
Once the old brake pads are removed, handle them with care. Brake dust is abrasive and can irritate the skin and lungs. Avoid direct contact with the brake pads and wear appropriate gloves. Old brake pads contain materials that should not be disposed of in regular household trash. Check with your local waste management authority for the proper disposal method.
Many recycling centers accept used brake pads, so check with your local options. Alternatively, some automotive parts stores may have a brake pad recycling program. Always follow the recommended disposal procedures to protect the environment.
Installing New Brake Pads
With the old brake pads removed, it’s time to install the new ones. This process requires precision and attention to detail to ensure optimal braking performance and safety. Remember, always refer to your vehicle’s service manual for specific instructions and torque specifications.Carefully examine the new brake pads before installation. They should be free of any damage or defects.
Note the orientation of the old pads – this is crucial for correctly fitting the new ones. Most brake pads have a slightly chamfered edge or wear indicator, this will guide you on the correct position.
Brake Pad Orientation
The new brake pads must be installed in the same orientation as the old ones. Incorrect installation can lead to uneven wear and reduced braking effectiveness. Look for any markings on the pads themselves that indicate the correct orientation; these are usually subtle and may indicate which side faces the rotor. If unsure, refer to your vehicle’s repair manual or consult a professional mechanic.
The chamfered edge should typically face outwards, towards the wheel rim.
Lubricating Caliper Pins and Guide Pins
Proper lubrication of the caliper pins and guide pins is essential for smooth caliper movement and prevents binding. This ensures consistent brake pad contact with the rotor and prevents premature wear. Use a high-temperature, silicone-based brake lubricant. Avoid using grease, as it can attract dirt and grime, leading to sticking calipers. Apply a small amount of lubricant to each pin, ensuring complete coverage.
Avoid excessive lubrication.
Reinstalling the Caliper
Once the new brake pads are in place, carefully reinstall the brake caliper. Ensure that the caliper slides smoothly onto the guide pins. If there is any resistance, carefully inspect the guide pins and caliper for any obstructions or damage. You may need to clean them thoroughly before attempting reinstallation. After the caliper is securely in place, compress the brake piston using a specialized tool (often a C-clamp and suitable block).
This is necessary to create sufficient space for the new, thicker brake pads. Then, reinstall the caliper bolts, tightening them to the manufacturer’s specified torque.
Post-Installation Checks and Procedures
Replacing your Mitsubishi L200’s brake pads is a significant task, and ensuring everything is working correctly afterwards is crucial for your safety. Neglecting post-installation checks could lead to compromised braking performance and potential accidents. Therefore, meticulously following these steps is paramount.After installing the new brake pads, several critical checks are necessary to guarantee optimal braking system functionality and driver safety.
These checks ensure the effectiveness of the newly installed components and prevent potential issues.
Brake Fluid Level Check
Checking the brake fluid level is a simple yet vital step. Low brake fluid can indicate a leak in the system, which is a serious safety concern. Before installing the new pads, the brake fluid level should have been checked. However, it’s essential to recheck the level after the installation to ensure no fluid has been lost during the process.
The brake fluid reservoir is typically located under the hood, clearly marked. It should be within the minimum and maximum markings on the reservoir. If the fluid level is low, investigate for leaks before topping it up with the correct type of brake fluid specified in your vehicle’s owner’s manual. Never overfill the reservoir.
Brake Bleeding Procedure
In some cases, air bubbles might enter the brake lines during brake pad replacement. These air bubbles can compromise braking effectiveness, resulting in a spongy brake pedal feel. Bleeding the brakes removes these air bubbles, restoring firm and reliable braking. This process involves opening bleed valves located on each brake caliper, allowing air to escape while brake fluid is pumped through the system.
This usually requires two people: one to pump the brake pedal and another to open and close the bleed valves. A clear tube attached to the bleed valve helps to observe the escaping fluid and identify when air is no longer present. Consult your vehicle’s repair manual for the precise bleeding sequence for your Mitsubishi L200 model.
Improper bleeding can lead to incomplete braking, so if you are not comfortable performing this procedure, seek professional assistance from a qualified mechanic.
Test Driving for Brake Performance Evaluation
A test drive is the ultimate verification of the brake pad replacement’s success. Choose a safe, quiet area away from traffic for this test. Begin with gentle braking at low speeds to feel the pedal’s responsiveness. Then, gradually increase the braking force to assess the stopping power and overall feel. Listen for any unusual noises, such as squeaking or grinding, which could indicate issues with the new pads or other brake components.
Need a step-by-step guide to changing Mitsubishi L200 brake pads? Knowing your vehicle’s braking system is crucial, just like understanding the long-term reliability of other Mitsubishi models. For a comprehensive look at another popular choice, check out this Best Mitsubishi Outlander PHEV long term review and reliability before tackling your L200’s brakes. Remember safety first when working on your vehicle; always consult your owner’s manual for detailed instructions on brake pad replacement.
If you experience a spongy brake pedal, unusual noises, or inconsistent braking performance, immediately stop the vehicle and do not continue driving. A professional mechanic should investigate the problem before driving the vehicle again. A successful test drive should result in firm, consistent braking and a reassuring pedal feel, confirming the effective installation of the new brake pads.
Visual Aids
Visual aids are crucial for understanding the brake pad replacement process. Clear illustrations can significantly reduce the risk of errors and ensure a smooth, safe repair. The following sections provide detailed descriptions of key steps, focusing on clarity and precision.
Caliper Removal: A Step-by-Step Illustration
Removing the brake caliper is a critical step. Improper removal can damage the caliper or surrounding components. The following steps, accompanied by a mental image, detail the process:Imagine the caliper, a C-shaped metal clamp holding the brake pads against the rotor.
1. Loosen the Caliper Bolts
Using a wrench of the appropriate size, carefully loosen the two bolts securing the caliper to the caliper bracket. Do not completely remove the bolts yet; just break them free. This prevents the caliper from dropping unexpectedly.
2. Support the Caliper
Once the bolts are loosened, carefully support the caliper with one hand. This prevents the caliper from hanging by the brake lines, which could damage them. You might use a wire or a bungee cord to gently secure the caliper to something nearby.
3. Remove the Caliper Bolts
Now completely remove the bolts and carefully separate the caliper from the bracket. Keep the caliper suspended to avoid stressing the brake lines.
4. Detach the Brake Pads
With the caliper removed, the old brake pads should be easily accessible. Observe their condition for wear and tear.
New Brake Pad Orientation
Correct brake pad orientation is essential for effective braking and even wear. Misaligned pads can lead to uneven braking and premature wear.Imagine a new brake pad with two distinct sides. One side typically has a slightly chamfered edge or a wear sensor.
Proper Orientation: The chamfered edge, or the wear sensor if present, should face the outside of the rotor. This ensures that the pad wears evenly and the sensor correctly alerts you to low pad levels. The brake pad should sit flush against the caliper and the rotor.
Incorrect Orientation: Installing the brake pad with the chamfered edge inward will result in uneven wear, potentially leading to reduced braking performance and accelerated pad wear. The wear sensor, if present, may not function correctly.
Brake Caliper Piston: Internal Components and Function
The brake caliper piston is a crucial component responsible for applying pressure to the brake pads. Understanding its function is important for safe and effective brake maintenance.Imagine a cylinder with a tightly fitting piston inside.The brake caliper piston is a hydraulically-actuated component. When you press the brake pedal, brake fluid is pressurized, pushing the piston outward. This outward movement pushes the brake pads against the rotor, creating friction and slowing or stopping the vehicle.
The piston’s internal components ensure a smooth and controlled movement, preventing leaks and maintaining consistent braking pressure. The piston’s seal is critical; a damaged seal can lead to brake fluid leaks and require a caliper rebuild or replacement.
Troubleshooting Common Issues: Step-by-step Guide To Changing Mitsubishi L200 Brake Pads
Replacing your Mitsubishi L200’s brake pads might seem straightforward, but sometimes you’ll encounter unexpected hurdles. Knowing how to address these issues can save you time, frustration, and potentially costly mistakes. This section Artikels common problems and provides practical solutions to get you back on the road safely.
Stuck Caliper Piston
A stuck caliper piston is a common problem that prevents the brake pads from being properly installed. This occurs when corrosion or debris prevents the piston from retracting smoothly. If you find yourself struggling to compress the piston, it’s crucial to address this issue before proceeding.
- Assessment: Carefully inspect the caliper piston for any visible signs of corrosion or damage. Try gently pushing the piston back into the caliper using a C-clamp or specialized piston compression tool. If it doesn’t move easily, proceed to the next step.
- Solution: If the piston is stuck, you may need to use a specialized tool to carefully compress it. Avoid using excessive force, as this could damage the caliper. Lubricating the piston with a high-quality caliper lubricant can also help to free it up. If the piston remains stubbornly stuck, professional assistance might be necessary to avoid damaging the braking system.
- Prevention: Regularly inspect your brake system for signs of corrosion and consider applying a protective coating to help prevent future issues.
Difficult Wheel Removal
Removing the wheel can sometimes prove challenging due to rusted or seized lug nuts. This can delay the entire brake pad replacement process.
- Assessment: Before attempting to remove the wheel, ensure you have the correct lug wrench. Try to loosen the lug nuts while the vehicle is still on the ground. If they’re very tight, use a breaker bar for extra leverage.
- Solution: If the lug nuts are severely rusted or seized, penetrating oil can help to loosen them. Apply the oil generously to the lug nuts and allow it to penetrate for several minutes before attempting to loosen them again. If the nuts still won’t budge, professional assistance may be required to avoid damaging the wheel studs.
- Prevention: Regularly clean and lubricate your lug nuts to prevent seizing. Consider using anti-seize compound on the threads during future wheel changes.
Brake Pad Wear Indicators
Uneven brake pad wear can indicate problems within the braking system. It’s crucial to assess this before installing new pads.
- Assessment: Inspect the old brake pads for uneven wear. Excessive wear on one side might suggest a problem with the caliper, wheel bearing, or suspension components.
- Solution: If you notice uneven wear, it’s recommended to have a qualified mechanic inspect your braking system to identify and address the underlying issue before installing new brake pads. Ignoring this could lead to further damage and compromise braking performance.
- Prevention: Regular brake inspections are vital to catch potential problems early. Schedule routine maintenance according to your vehicle’s manufacturer recommendations.

